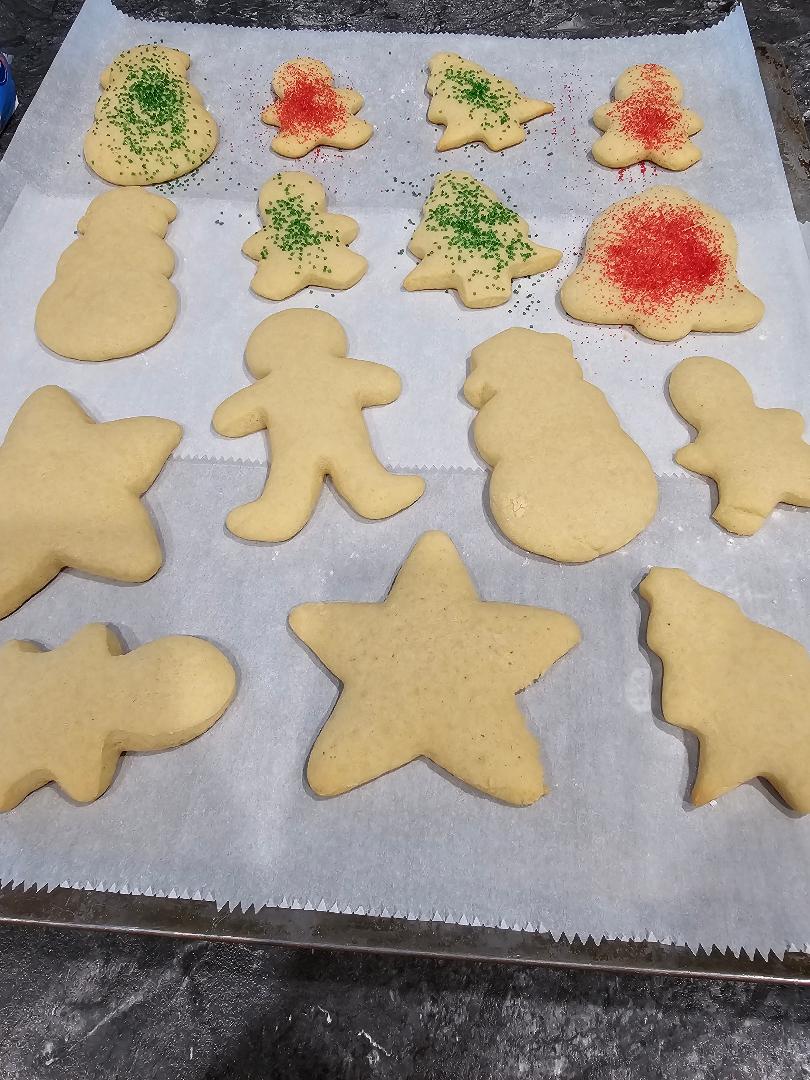
Fresh baked sugar cookies right out of the oven
My Gramma Mildred died a few months before I was born, but my parents made sure we kids learned many of her recipes to keep her with us.  This sugar cookie recipe was one that my mom had me helping her make every Christmas (and Easter, Halloween, and sometimes even Thanksgiving) since I was very small.  

I am not great at the “mix like pie crust” part, so I wing it.  I know, I know, baking is supposed to be all exact and shit.  But life is full of surprises, so you gotta roll with it and have some fun!  

My mom taught me to bake and, while you gotta pay pretty close attention to the measurements, it’s really nothing to stress about!  Baking should be fun and I never, ever bake anything when I’m in a bad mood.  It totally impacts the outcome of your food!  

My little sister has a need to be exact with recipes and struggles with baking because it stresses her out.  If you are stressing, you ain’t having fun and the cookies will show that.  However, she is WAY better at making my other Gramma’s chocolate cookies, but that’s another story.

No Salt–What?

I keep going back to the fact that Gramma didn’t include salt in her sugar cookie recipe.  I’ve been reviewing a LOT of recipes and there is almost ALWAYS salt.  I hadn’t noticed that before, but clearly it’s not needed because these cookies are awesome!  

Chilling time:

The chilling time isn’t exact either, but the dough does get kind of sticky if you skip the chilling.  As a kid, this was SUCH A LONG WAIT, so I took to sneaking in the frig and snagging some raw dough (YUM).  I DO NOT RECOMMEND THIS, but it was fun when I was a kid.  In the seventies and eighties, you just did dangerous stuff like that.  They were wild times.  The point is the chilling time doesn’t HAVE to be 2 hours, I am not consistent with my chilling time and everything turns out just fine.  I have previously made the dough one day and rolled it out/baked it a different day.  Literally, nothing bad happened.

Leftover Dough:

There will likely be a point where you can no longer roll any more dough but you still have the dough parts sitting there.  My mom always threw these extra scraps on the baking sheet and put cinnamon and sugar on them before baking.  It was pretty good!  You can be creative here or just throw out the extra.  No rules with this part, other than to have fun!

Frosting:

I’ve included the powdered sugar frosting “recipe” that my mom used and we still use because it’s super simple and pretty tasty.  There isn’t an exact recipe because it’s water and powdered sugar mixed to the consistency you need and the amount you need for however many cookies you’re making.  That’s why it’s so easy!  Honestly, the frosting can be anything you want, everybody has their favorites.  I know people who use premade store-bought frosting and if that’s what makes you happy, go for it!  Absolutely no judgment here, do what you want!

Let’s get baking!

Tools you might need:

**Hey! Just a heads up — this post might contain affiliate links, where I can get a little extra cash if you buy something through my links–no extra cost to you, promise!

Stand-Mixer
Baking Pans
Cookie Cutters
rolled out cookie dough with cookie cutters in Christmas shapes

Preparation Time: 20 minutes
Chilling Time: 2 hours
Baking Time: 10-12 minutes
Yields: Approximately 2 dozen cookies

From my family to yours, enjoy your homemade cookies!

Add your ingredients here.For the Cookies:

3 cups all-purpose flour
1 teaspoon baking soda
2 teaspoons baking powder
1 cup unsalted butter, softened
1 cup white granulated sugar
2 large eggs
1 teaspoon vanilla extract
1/2 teaspoon almond extract (optional, for added flavor)

For Powdered Sugar Frosting:

2 cups powdered sugar (ish)
1/4 cup warm water (ish)
Food coloring (optional)

Tools you’ll need:

Large bowl
Medium bowl
Stand mixer or hand mixer
Measuring cups and spoons
Rolling Pin
Rolling Mat (not required, you can totally use a floured countertop.  I use my mom’s old Tupperware mat from the ’70s — super Kitsch!)
Cookie Cutters
Baking sheets

1. In a medium-sized mixing bowl, mix like pie crust flour, baking soda, baking powder, and butter. Set this mixture aside.

2. In a large mixing bowl, cream the softened butter and sugar together until the mixture becomes light and fluffy. This can take about 2-3 minutes using an electric mixer on medium speed.

3. Beat in the eggs, vanilla extract, and almond extract (if using) until well combined. Scrape down the sides of the bowl as needed to ensure even mixing.  (The almond extract option is from a Google search, my Gramma’s recipe doesn’t use this option.  It sounds pretty good though, so I included it here.)

4. Gradually add the dry ingredients to the wet ingredients, mixing on low speed until the dough comes together. 

5. Cover the bowl with plastic wrap and refrigerate for 1-2 hours. Chilling the dough is essential for easy rolling.  

6. Preheat your oven to 375°F (190°C) and line baking sheets with parchment paper or silicone baking mats.

7. On a lightly floured surface, roll out one of the dough to a thickness of about 1/4 inch (no need to be exact). Use cookie cutters to cut out desired shapes. Re-roll any leftover dough and continue cutting until all the dough is used.  

8. Place the cut-out cookies on the prepared baking sheets, leaving some space between them as they will expand while baking.

9. Bake in the preheated oven for 10-12 minutes, or until the edges of the cookies are lightly golden. The exact time may vary, so keep a close eye on them. 

10. Remove the cookies from the oven and let them cool on the baking sheets for a few minutes. Then, transfer them to a wire rack to cool completely.

For the Powdered Sugar Frosting:

1. Place some of the powdered sugar in a bowl and gradually add water while mixing. Continue to mix until the icing is smooth and glossy. You may need to adjust the amount of water and powdered sugar to achieve the desired consistency.  Don’t stress about amounts here, it’s not crazy scientific.

2. If you want to add color to the icing, now is the time. Divide the icing into separate bowls if you wish to use different colors.

3. Pipe the frosting onto the cooled cookies Using a piping bag or a plastic sandwich bag with a small hole cut in one corner. I mean, you can do it the old-school way and use a butter knife or spatula, if you aren’t feeling fancy.  Add any sprinkles or decorations while the icing is still wet.

4. Allow the frosting to set and harden for a few hours before stacking or storing the cookies.

Leave a Reply

Your email address will not be published. Required fields are marked *